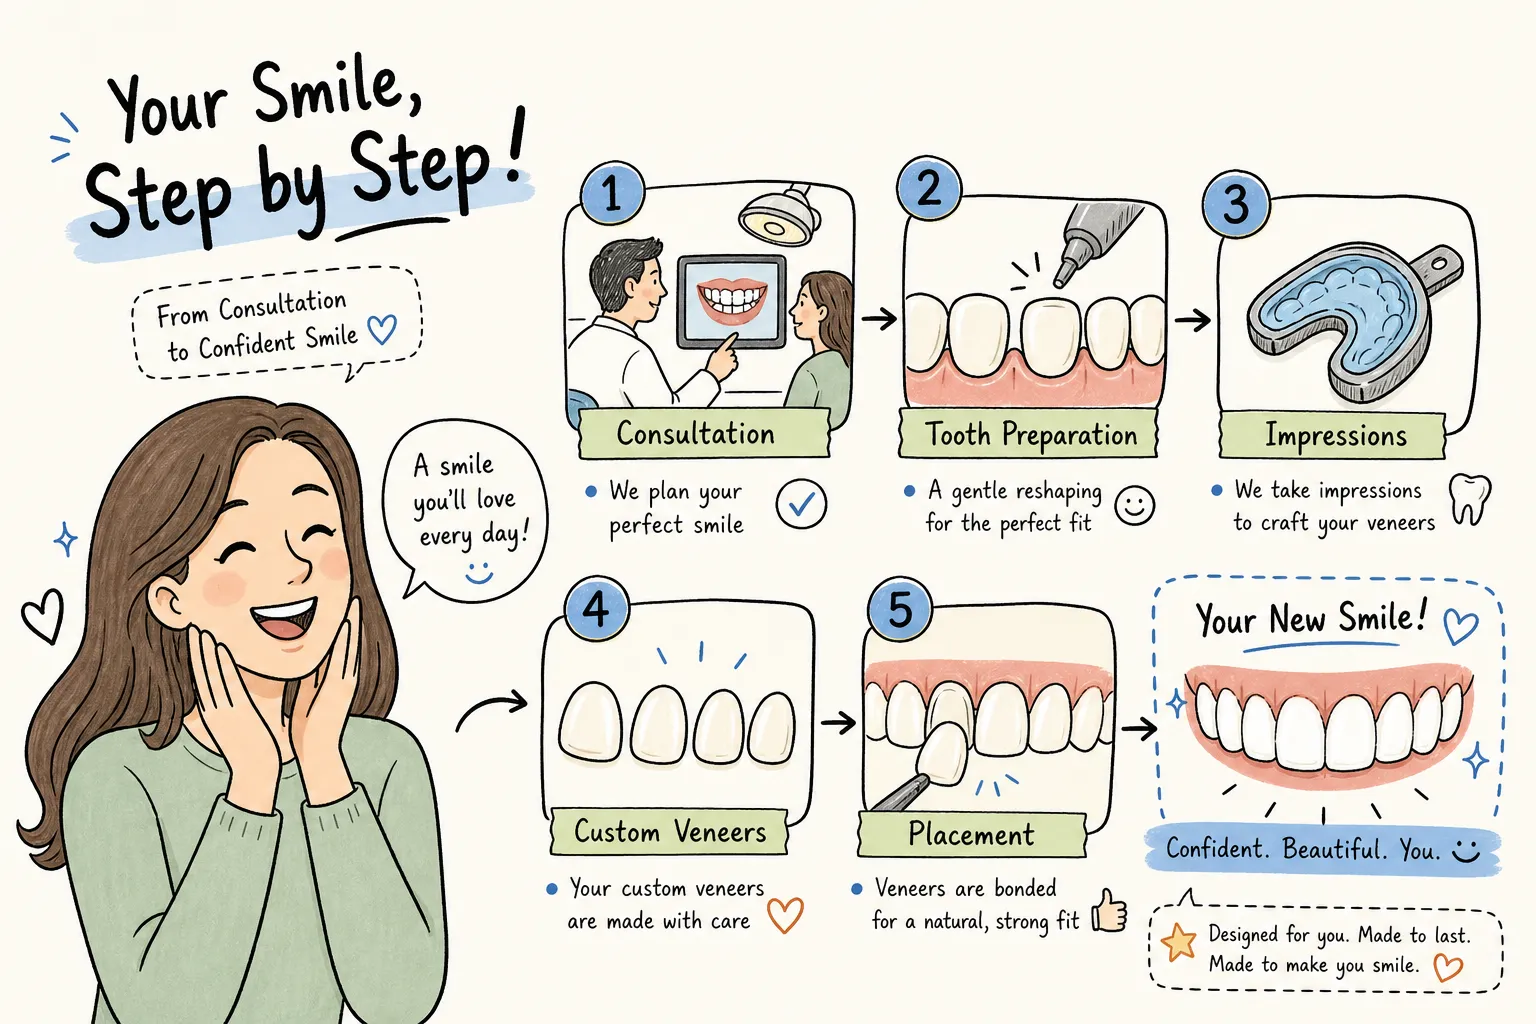
Step-by-Step Process of Getting Dental Veneers: A Comprehensive Guide to the Step by Step Process of Getting Dental Veneers, including insights on the step by step process of getting dental veneers.
Many patients delay booking a veneer consultation, not because they’re unsure about the result, but because they have no idea what actually happens between the first appointment and the finished smile. Before-and-after photos are everywhere online. Clear, stage-by-stage explanations of what each visit involves are not always easy to find.
This article walks you through the step-by-step process of getting dental veneers in Australia, providing a detailed step by step process of getting dental veneers to answer the questions patients are almost too embarrassed to ask. At Sunbury Dental Group in Sunbury VIC, our approach is simple: no procedure starts until you fully understand it. No surprises, no unexplained steps, and no pressure to commit before you’re ready.
This article elaborates on the step by step process of getting dental veneers, highlighting each phase involved in the journey of getting dental veneers.
Here’s what the full journey looks like: initial consultation, tooth preparation, lab fabrication, bonding appointment, recovery, and what you can expect to pay in 2026.
Step-by-step process of getting dental veneers: from consultation to bonding and the step by step process of getting dental veneers
Understanding the step by step process of getting dental veneers can greatly alleviate your concerns and enhance your overall experience.
The first appointment is not just a chat about what shade of white you’d like. It’s a clinical assessment, a candidacy check, and a design session rolled into one visit. By the end of it, both you and your dentist should know whether veneers are the right path and exactly what the treatment will involve.
Candidacy check and oral health assessment
The candidacy check is essential in determining your eligibility for the step by step process of getting dental veneers.
Before any cosmetic work begins, your dentist evaluates whether your teeth and gums are healthy enough to support veneers. Active gum disease, significant decay, severely worn enamel, or an unmanaged grinding habit all need to be addressed first. The basic criteria are clear-cut: sufficient enamel, reasonably aligned teeth, and no untreated decay or infection.
If you’re told you’re not a suitable candidate at this stage, that’s not a rejection. It usually means your dentist is steering you toward a better long-term outcome. Placing veneers over unstable gums or active decay would be like painting over a wall with structural damage. It looks fine at first, then fails.
Ensure you understand the step by step process of getting dental veneers before proceeding with treatment.
Digital scans, X-rays, and smile design
The diagnostic side of the consultation includes digital X-rays, intraoral scans (which have replaced traditional gel impressions at most modern Australian clinics), and clinical photographs. Some dentists also offer a digital smile preview or a physical wax-up, a mock-up of your proposed result built over a model of your teeth. This lets you visualise the shape and length of your veneers before any enamel is touched.
Digital tools now aid in visualizing the step by step process of getting dental veneers more effectively.
At Sunbury Dental Group, this design conversation is built into the consultation process. The goal is to make sure your expectations and the clinical reality are aligned from the very beginning, not after preparation has already started.
Questions to ask at your veneers consultation
Gathering information on the step by step process of getting dental veneers will help you feel more prepared during your consultation.
Come to your consultation ready to gather specific information. Confirm how many appointments are required, whether temporaries will be fitted, which veneer material is recommended (porcelain versus composite), the total cost, and what payment options are available. Ask how much enamel will be removed and whether a digital smile design or wax mock-up is part of the process. Having clear answers at this stage makes every subsequent visit far less stressful.
Tooth preparation and wearing temporaries
Knowing the step by step process of getting dental veneers can ease the anxiety surrounding tooth preparation.
This is the stage that causes the most anxiety, largely because of the phrase “shaving your teeth.” The reality is considerably less dramatic than that description suggests, and understanding it clearly should put most of the worry to rest.
How much enamel is removed, and is it reversible?
The actual enamel removal is a crucial part of the step by step process of getting dental veneers.
For porcelain veneers, your dentist removes between 0.3 and 0.7 mm of enamel from the front surface of each tooth. That’s roughly the thickness of a contact lens. This creates space so the veneer sits flush with your natural teeth rather than adding bulk to the surface.
This is a permanent change. Enamel does not regenerate, which means once the tooth is prepared, it will always require some form of coverage, whether that’s a new veneer, a crown, or dental bonding down the track. This is precisely why the decision to proceed should not be rushed. No-prep and minimal-prep options do exist for select cases, but traditional porcelain veneers require some enamel reduction to function correctly long-term.
Understanding this will clarify the long-term implications of the step by step process of getting dental veneers.
Local anaesthetic and what you’ll actually feel
Local anaesthetic is standard for tooth preparation, and during the procedure you’ll feel pressure and movement rather than pain. The numbness typically lasts two to four hours after the appointment, though this can vary depending on the anaesthetic used. Mild tenderness over the following day or two is normal and easily managed with over-the-counter anti-inflammatories like ibuprofen.
The level of comfort during the step by step process of getting dental veneers varies from patient to patient.
If you experience dental anxiety, mention it at your consultation. Options like nitrous oxide (happy gas) can be discussed and arranged beforehand, so you’re not managing it on the day with no plan in place.
Temporary veneers: protection during the lab wait
Temporary veneers play a vital role in the step by step process of getting dental veneers.
Once preparation is complete, your dentist takes digital impressions and fits temporary veneers over the prepared teeth. Their job is to protect the enamel while the permanent veneers are being fabricated, but they serve a secondary purpose too: they let you preview the approximate shape and length of your final result and give the dentist useful feedback before anything is permanently cemented.
Temporaries are not as strong as the permanent versions. During the lab wait, avoid hard and sticky foods, and be gentle when cleaning around them. Think of them as a placeholder, not a finished product.
Keeping your temporaries intact is essential for a smooth step by step process of getting dental veneers.
Lab fabrication: what happens between visits
This stage is largely invisible to the patient, but it’s where the quality of your final result is determined. For porcelain veneers, your dentist sends the impressions or digital scans taken at your preparation appointment to a dental ceramist, who builds the restorations by hand or mills them from a solid ceramic block.
The lab fabricates your final veneers, concluding the intricate step by step process of getting dental veneers.
Porcelain veneers: the lab timeline
Lab fabrication for porcelain veneers takes one to three weeks, depending on the laboratory and the complexity of the case. Most Australian patients are back for their bonding appointment within two to four weeks of preparation. Clinics using digital workflows and intraoral scanners have generally shortened this turnaround compared to the older gel impression method, as scans reach the lab instantly rather than being shipped physically.
Many patients appreciate understanding the timeline for the step by step process of getting dental veneers.
In 2026, the two most common materials are feldspathic porcelain (hand-layered by the ceramist for the highest level of translucency and natural appearance) and lithium disilicate, such as IPS e.max (milled from a solid block for strength and reliability). Both are excellent options; your dentist will recommend the most appropriate one based on the position of the teeth, your bite, and the aesthetic outcome you’re aiming for.
Composite veneers: the single-visit alternative
Choosing composite can sometimes expedite the step by step process of getting dental veneers.
Composite veneers skip the lab stage entirely. Your dentist applies and sculpts composite resin directly onto the tooth in the same appointment, building up layers and polishing to a final finish. The result can often be achieved in one to two visits, sometimes on the same day as the consultation.
Composite is considerably more affordable, but the trade-off is durability. Composite veneers typically last five to seven years before needing replacement or repair, compared to ten to fifteen years or longer for porcelain.
Composite veneers offer a quicker alternative in the step by step process of getting dental veneers.
Composite is also more susceptible to staining over time, particularly from coffee, tea and red wine. For patients who want an immediate result at a lower entry cost, composite is a practical starting point. For those investing in a long-term smile transformation, porcelain is worth the additional spend.
The bonding appointment: fitting your final veneers
The bonding appointment is the final touch in the step by step process of getting dental veneers.
The bonding appointment is the final clinical stage and the one that most patients feel nervous about heading into. In practice, it’s also the most simple.
The try-in stage: checking fit and shade
Checking the fit is a crucial part of the step by step process of getting dental veneers.
Before cementing anything permanently, your dentist places the veneers using water or a try-in paste to assess fit, shape, and colour against your natural teeth and gum line. This is your last opportunity to request adjustments. Take your time, view the result in natural light if possible, and be honest about anything that doesn’t feel right. A good cosmetic dentist will not rush this stage.
Etching, cementing, and curing
Each layer applied during this part of the step by step process of getting dental veneers is critical to success.
Once you’ve given the approval, the dentist cleans and etches the prepared tooth surface to create a micro-textured bonding area. A specialised resin cement is applied, the veneer is seated into position, and a curing light hardens the bond in seconds. This process is repeated for each tooth individually.
The procedure feels like pressure and light tapping. Local anaesthetic is available if needed, though many patients find the bonding appointment more comfortable than the preparation visit.
Understanding what to expect can help ease nerves during the step by step process of getting dental veneers.
Bite check and final adjustments
After all veneers are bonded, your dentist checks your bite using articulating paper, asking you to bite down to identify any high spots. Minor adjustments are made chairside using a fine polishing bur. The whole bonding appointment typically runs one to two hours depending on how many veneers are being placed, and you leave with the finished result the same day.
Final adjustments may be necessary to perfect the step by step process of getting dental veneers.
Pain, sensitivity, and aftercare: what’s actually normal
Post-procedure discomfort with veneers is mild compared to most dental treatments. Understanding what’s expected helps you distinguish normal healing from something that warrants a call to the clinic.
Post-procedure sensitivity is common, and understanding this is part of the step by step process of getting dental veneers.
Post-bonding sensitivity and how long it lasts
Sensitivity to temperature, particularly cold water and cold air, in the first few days after bonding is common and expected. It typically peaks within 24 to 48 hours and fades within three to five days. Over-the-counter anti-inflammatories manage this well for most patients. If sensitivity persists beyond a week or worsens rather than improving, contact your clinic for a follow-up assessment.
Being aware of what is typical helps manage expectations during the step by step process of getting dental veneers.
Habits and aftercare that protect your investment
The steps that extend veneer lifespan are uncomplicated:
Simple habits play a significant role in maintaining the benefits of the step by step process of getting dental veneers.
- Stick to soft foods for the first 48 hours after bonding
- Avoid staining drinks (coffee, red wine, tea) in the immediate post-bonding period
Adhering to these habits can greatly affect the outcome of the step by step process of getting dental veneers.
- Never use your teeth as tools to open packaging or bite nails
- Wear a custom night guard if you grind your teeth, even occasionally
Your willingness to protect your investment is key during the step by step process of getting dental veneers.
- Attend six-monthly check-ups and professional cleans
Unmanaged bruxism is the single biggest threat to veneer longevity. Without a night guard, grinding can reduce a veneer’s lifespan by 30 to 50 per cent. If grinding is a concern, raise it at your consultation before preparation begins, not afterwards.
Discussing any concerns ahead of time is beneficial in the step by step process of getting dental veneers.
What veneers cost in Australia in 2026 and how long they last
Veneers are a significant investment, and going in with realistic financial expectations makes the whole process smoother.
Understanding the financial aspect is crucial in the step by step process of getting dental veneers.
Porcelain vs composite: cost comparison in 2026
In Australia in 2026, a single porcelain veneer costs between $1,200 and $2,500 per tooth, depending on the clinic location, the ceramist’s skill level, and case complexity. Melbourne-area clinics typically sit between $1,400 and $3,000 for porcelain. Composite veneers are considerably more accessible, ranging from $400 to $1,200 per tooth.
Knowing what to expect in terms of costs can relieve some stress in the step by step process of getting dental veneers.
Private health insurance rarely covers veneers because they are classified as cosmetic treatment. Some top-tier major dental extras policies may offset a portion of the cost if there is a documented restorative or functional reason for the treatment, such as repairing a tooth damaged by trauma. Check with your fund directly and have your dentist provide the relevant item numbers and clinical notes. Sunbury Dental Group offers flexible payment plans to make treatment accessible without requiring full payment upfront, ask the team about your options at the consultation.
Longevity: how long do veneers actually last?
Longevity concerns are often addressed during the step by step process of getting dental veneers.
Porcelain veneers, with proper care, last ten to fifteen years or longer before needing replacement. Composite veneers typically last five to seven years and may require polishing or minor repair within that window. Over the full lifespan of a smile, the higher upfront cost of porcelain pays off through fewer replacements and superior resistance to staining.
The biggest factors shortening veneer lifespan are not material-related; they’re behavioural. Grinding without a night guard, biting hard objects, using teeth as tools, smoking, and skipping regular dental visits all reduce longevity significantly. Patients who maintain excellent oral hygiene and attend regular check-ups consistently get the best long-term outcomes.
Habits that affect longevity are a critical consideration in the step by step process of getting dental veneers.

You’re now ready to walk in prepared
The step-by-step process of getting dental veneers runs like this: consultation and candidacy check, tooth preparation under local anaesthetic, temporary veneers during the lab wait, the bonding appointment with its try-in and curing stages, and a short recovery period. For porcelain, that’s two to three visits over two to four weeks. For composite, it’s typically one to two visits, often completed in a single day.
The entire step by step process of getting dental veneers can be both exciting and daunting.
For many patients, the unknown can be a bigger barrier than cost or commitment. Patients who walk into each appointment understanding exactly what’s about to happen consistently report a better experience. That clarity is something every good dental clinic should provide from the very first visit.
If you’re based in Sunbury or the surrounding area and want to understand whether veneers are the right option for your smile, a consultation with the team at Sunbury Dental Group is the logical first step. The getting-veneers timeline starts with a conversation, and nothing happens without your full understanding and sign-off. Book your smile consultation with Sunbury Dental Group today, and bring your questions.
Ultimately, the step by step process of getting dental veneers is about achieving your desired smile.
FAQ Content
How many appointments does it take to get dental veneers?
Porcelain veneers typically require two to three visits over two to four weeks: a consultation, a preparation appointment, and a bonding appointment once the lab finishes fabrication. Composite veneers usually take one to two visits and can often be completed in a single day since there’s no lab wait.
How much enamel is removed for veneers, and does it grow back?
For porcelain veneers, dentists remove between 0.3 and 0.7 mm of enamel from the front of each tooth, roughly the thickness of a contact lens. This change is permanent because enamel does not regenerate, so the tooth will always need some form of coverage afterward.
Does getting veneers hurt?
Tooth preparation is done under local anaesthetic, so you’ll feel pressure and movement rather than pain, with numbness lasting two to four hours afterward. Mild tenderness for a day or two is normal and manageable with over-the-counter anti-inflammatories like ibuprofen.
What happens while I wait for my permanent veneers?
After preparation, your dentist fits temporary veneers to protect the exposed enamel while the lab fabricates your permanent ones, a process that takes one to three weeks. Temporaries are weaker than permanent veneers, so avoid hard or sticky foods and clean around them gently during this period.
Porcelain veneers are fabricated in a lab, last ten to fifteen years or longer, and cost $1,200 to $2,500 per tooth in Australia, while composite veneers are sculpted directly onto teeth in one visit, last five to seven years, and cost $400 to $1,200 per tooth. Composite is also more prone to staining from coffee, tea, and red wine over time.
Is sensitivity normal after getting veneers, and how long does it last?
Yes, sensitivity to cold water and cold air is common in the first few days after bonding, typically peaking within 24 to 48 hours and fading within three to five days. If sensitivity persists beyond a week or gets worse, contact your clinic for a follow-up assessment.
What happens at the bonding appointment?
Your dentist first tries in the veneers using water or paste to check fit, shape, and colour, giving you a final chance to request adjustments. Once approved, the teeth are etched, resin cement is applied, each veneer is seated and cured with light, and your bite is checked and adjusted, with the whole appointment taking one to two hours.
Does health insurance cover the cost of veneers?
Private health insurance rarely covers veneers since they’re classified as cosmetic treatment, though some major extras policies may offset costs if there’s a documented restorative or functional reason, such as trauma repair. Sunbury Dental Group offers flexible payment plans to make treatment accessible without full upfront payment.
How do I make my veneers last as long as possible?
Stick to soft foods for the first 48 hours, avoid staining drinks immediately after bonding, never use your teeth as tools, wear a custom night guard if you grind your teeth, and attend six-monthly check-ups and cleans. Unmanaged grinding is the single biggest threat to veneer longevity, reducing lifespan by 30 to 50 percent without a night guard.
Am I a good candidate for dental veneers?
Good candidates have sufficient enamel, reasonably aligned teeth, and no untreated decay or infection. Active gum disease, significant decay, severely worn enamel, or unmanaged teeth grinding need to be addressed first before veneers can be placed.
What should I ask at my veneers consultation?
Confirm how many appointments are required, whether temporaries will be fitted, which material is recommended, total cost, payment options, how much enamel will be removed, and whether a digital smile design or wax mock-up is included